How to derive 24-hour intensities with QGIS
In Urban Strategy, intensities published by the traffic assignment model per daypart, usually the morning peak, evening peak and rest of day. This guide describes how to combine daypart intensities from an Urban Strategy scenario into one 24-hour (all-day) intensity value, using QGIS. The resulting layer can be used for reporting, visualization, or further analysis that requires all-day traffic volumes.
Time required: about 30 minutes
Prerequisites: the QGIS Connector plugin and an approved account with REST API access.
Learning objectives
- How to identify the
dimension_idof each daypart - How to load the roads collection per daypart from Urban Strategy into QGIS
- How to combine daypart intensities into a 24-hour value using the field calculator
- How to interpret and adjust the resulting expression for your own setup
What is a dimension_id?
A dimension in Urban Strategy is a unique combination of mode, trip purpose and daypart. Therefore, every road in the roads collection has a dimension_id, which points to the object_id in the traf_dimensions collection.
Step 1: Connect QGIS to Urban Strategy
Connect QGIS to Urban Strategy as described in the QGIS Connector tutorial.
Step 2: Load the traf_dimensions collection into QGIS
-
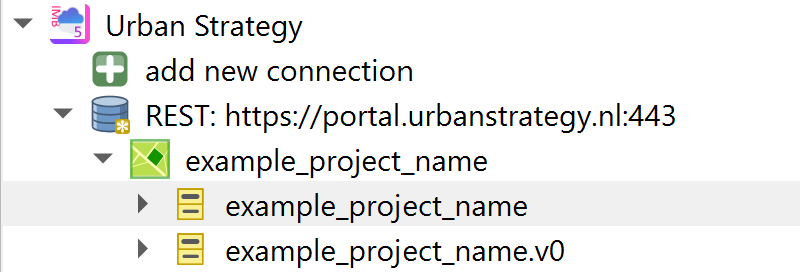
In the QGIS browser panel, expand the relevant project and open the main bin.
-
Double click the traf_dimensions collection to load it as a new layer into QGIS.

-
With the new layer selected, open the QGIS attribute table
 . The layer contains, among others, the following columns:
Column name Description DAYPART The daypart of the dimension DAYPART_ID The ID of the daypart DETAILS Describes the combination of daypart, mode and motive MODE_ID Points to the object_idin thetraf_modescollection.MOTIVE The travel purpose of the dimension OBJECT_ID Unique identifier for the dimension -
Identify which
object_idvalues match the dayparts to be summed into a 24-hour intensity layer. For this guide the following traf_dimension table is used.DAYPART DAYPART_ID MODE_ID MOTIVE OBJECT_ID Morning peak 1 1 Total 1 Evening peak 2 1 Total 11 Rest of day 3 1 Total 21 Resulting in the
object_idvalues 1, 11 and 21 as unique identifiers for the morning rush hour, evening rush hour and rest of day respectively.Be aware that this might be different in your case.
The
object_idvalues as used in this guide may be different from the ones you'll need. Make sure to always check the traf_dimensions collection of your setup.
Step 3: Load the morning rush hour intensities
-
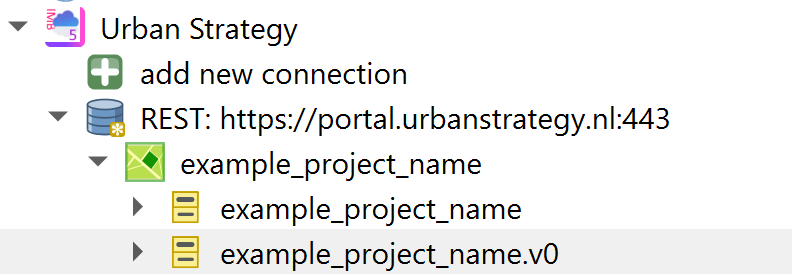
Open the scenario for which you want to configure the 24-hour intensities.
-
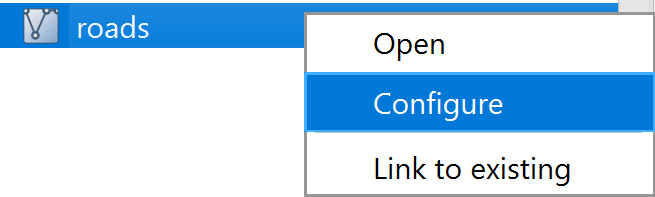
Right click on the roads collection and choose configure.
-
In the filter field, enter a filter on
dimension_idfor the daypart you want to load. In this case, the morning rush hour, which corresponds toobject_id1 in the traf_dimensions collection (as identified in step 2). Therefore, load the roads layer with:dimension_id = 1To prevent loading the entire network, it's recommended to use additional filters such as:
dimension_id = 1 AND district_id > 0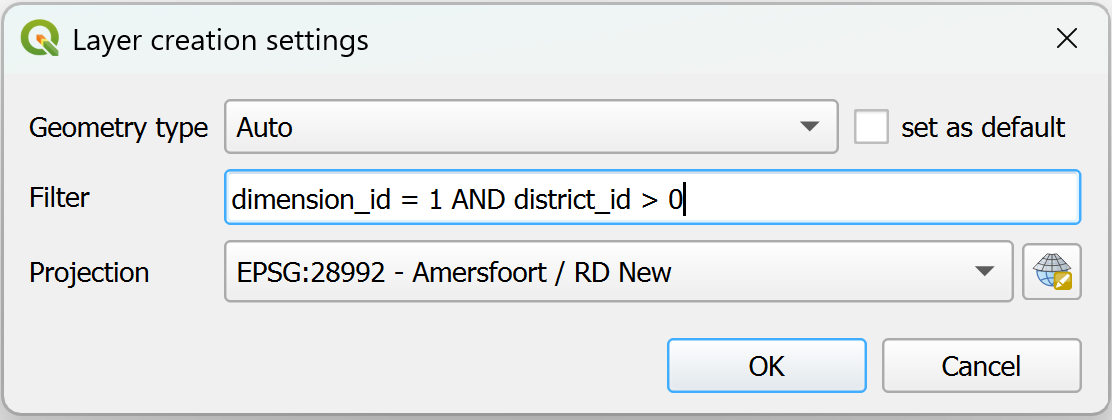
-
After loading the layer, ensure to give it a different name. For example: roads_morning_rush_hour
Step 4: Load the evening rush hour intensities
Similarly to step 3, load the roads layer for the evening rush hour, which in this case corresponds to object_id 11 in the traf_dimensions collection (as identified in step 2). Therefore, the filter will be:
dimension_id = 11
Or with additional filters
dimension_id = 11 AND district_id > 0
Also rename this layer, for example to: roads_evening_rush_hour
Step 5: Load the rest of day intensities
Similarly to step 3 load the roads layer for the rest of day, which In this case corresponds to object_id 21 in the traf_dimensions collection (as identified in step 2). Therefore, the filter will be:
dimension_id = 21
Or with additional filters
dimension_id = 21 AND district_id > 0
Also rename this layer, for example to: roads_rest_of_day
Step 6: Create a 24-hour intensity
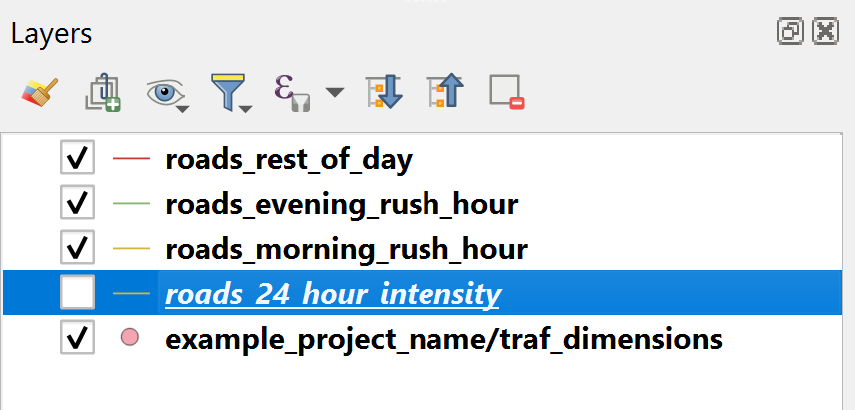
At this point you should have three road layers in QGIS: one for the morning rush hour, one for the evening rush hour and one for the rest of day.
-
Duplicate one of the three daypart layers, for example
roads_morning_rush_hour. -
Rename the copy, for example to roads_24_hours_intensity.
Step 7: Calculate 24-hour intensity values
Every road layer has an INTENSITY_L and INTENSITY_R column, containing the intensity values on that side of the shape respectively. The intensity values in the roads collection have a certain duration, for example 2 hours or hourly intensities. This should be correct for when calculating the 24-hour intensity.
For this guide, the intensities have the following duration:
| Daypart | Intensity values | Duration |
|---|---|---|
| Morning rush hour | Vehicles / 2 hours | From 7:00 to 9:00 |
| Evening rush hour | Vehicles / 2 hours | From 17:00 to 19:00 |
| Rest of day | Vehicles / 2 hours | From 9:00 to 17:00 and 19:00 to 7:00 |
Therefore the rest of day intensities should be scaled by 6.095 (12.19/2)
-
Open the field calculator on the roads_24_hours_intensities layer.
-
Update the existing
INTENSITY_Lfield using the following expression:
    coalesce(
        attribute(
            get_feature('roads_morning_peak', 'OBJECT_ID', "OBJECT_ID"),
            'INTENSITY_L'
        ), 0
    )
    +
    coalesce(
        attribute(
            get_feature('roads_evening_peak', 'OBJECT_ID', "OBJECT_ID"),
            'INTENSITY_L'
        ), 0
    )
    +
    6.095 * coalesce(
        attribute(
            get_feature('roads_rest_of_day', 'OBJECT_ID', "OBJECT_ID"),
            'INTENSITY_L'
        ), 0
    )
- Repeat the same expression for the
INTENSITY_Rfield:
    coalesce(
        attribute(
            get_feature('roads_morning_peak', 'OBJECT_ID', "OBJECT_ID"),
            'INTENSITY_R'
        ), 0
    )
    +
    coalesce(
        attribute(
            get_feature('roads_evening_peak', 'OBJECT_ID', "OBJECT_ID"),
            'INTENSITY_R'
        ), 0
    )
    +
    6.095 * coalesce(
        attribute(
            get_feature('roads_rest_of_day', 'OBJECT_ID', "OBJECT_ID"),
            'INTENSITY_R'
        ), 0
    )